SMS Baden/Bayern Casemate Page!
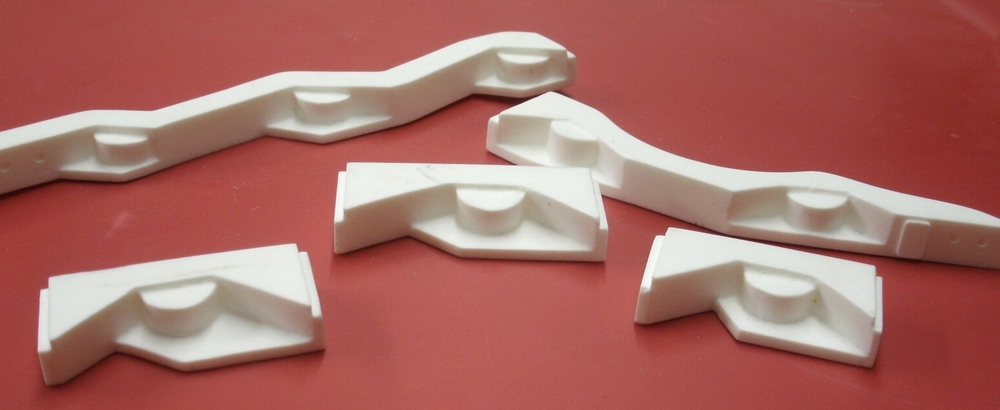
| The SMS Baden casemate pieces are intended to make it easy to refit existing ships to meet the new weather/casemate deck combat rules and at the same time add a level of detail and beauty not easily achieved before. These pieces are easy to mount and the position of each is easily adjusted to allow them all to fit as needed between existing turret barbettes (for refits). |
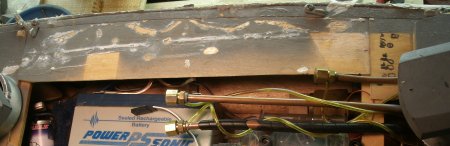
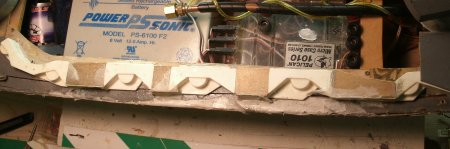
| I) The first step is to remove the existing casemate structure (if re-fitting an existing ship) or else install the subdeck into the hull that the casemates will sit on. The image at right shows the SMS Bayern after removal of the previous solid-block casemates (you can see from the glue residue where it used to be). The excess deck will also be removed to allow more room for access (shown later). |
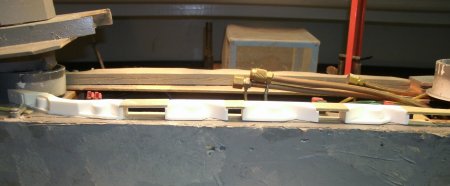
II) The next step is to determine the placement of each casement piece. The front piece (S1/P1) is designed to start where the deck is solid (1/2" back from gunwale) - which conveniently is where the fiberglass hull ends in the currently available commercial hull (see photo at right). The stern piece (S5/P5) is the all-solid area in back so it is placed so that it touches the rear barbette and angled till the other edge is 1/2" from the hull (see photo below).
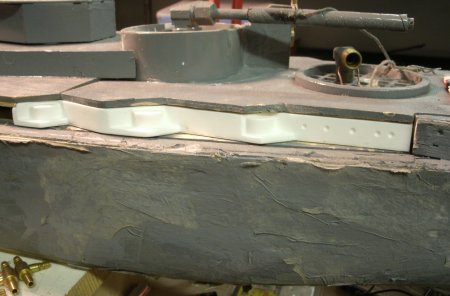
The remaining casemate pieces (S2-S4/P2-P4) are spread out between the first two pieces and glued down 1/2" from the edge of the hull (or slightly adjusted as-needed to align with existing superstructure for refits).
Note: a template is provided with each set to provide the scale position of each detailed piece. However, for "refit ships" where barbettes are already in place and these casemates must align with existing superstructure it is a simple matter to glue each down where it needs to be and cut the 1/8" plywood spacers to fit those positions (this allows for those slight variations in each captains existing superstructures).
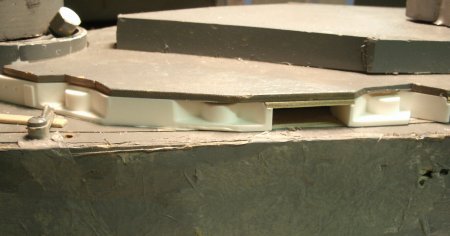
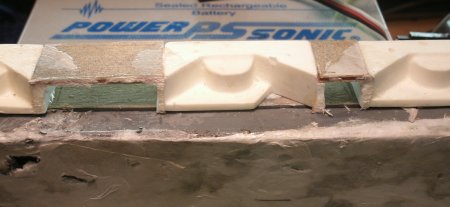
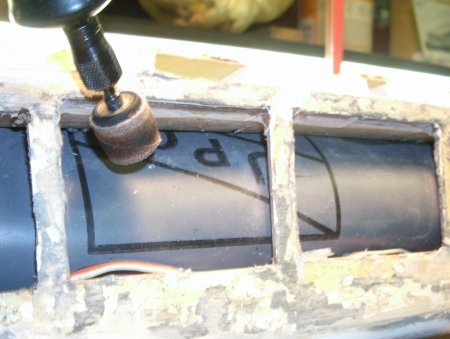
III) After all the casemate pieces are positioned and glued in place, cut 1/8" spacers (we recommend using left-over scraps from the 1/8" deck) to fit between each piece and glue them in place as well. Note: a 1/8" notch is already cast into each piece (see photo at right) to make it easy to mount the piece and provide a stronger surface to glue to.
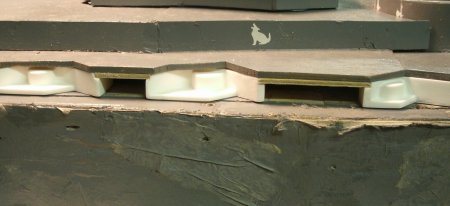
Another nice feature this allows is to cut the top deck over the casemates true-to-form (it did not simply follow the casemate contours). The overhangs and shadows add a sense of depth and realism!
Don't forget if it is a refit project to go back during re-sheeting and grind the underside between each rib down to 1/4" thickness!
We also recommend for refit Baden/Bayerns that the captain go back in and cut away extra subdeck behind the casemates as shown above.
Final Note: this Bayern was done with the new casemates becoming part of the solid hull below, however with proper planning (especially during a new Baden/Bayern construction) they could be glued via their tops to the main deck and be made to lift out like superstructure)